Olive Garden Breadsticks
If you have ever dined at Olive Garden, you know one of the highlights is their delicious, soft, and buttery breadsticks. The Olive Garden Breadsticks are synonymous with endless baskets, warm aroma, and the perfect appetizer before a hearty Italian meal.
Their pillowy texture, subtle garlic butter glaze, and irresistible flavor have made them an American dining icon. This recipe will guide you to making these legendary breadsticks right from your own kitchen, capturing their authentic taste and texture.
By baking these breadsticks from scratch, you can enjoy the Olive Garden Breadstick experience without leaving your home, while customizing them to your liking. Making breadsticks at home allows you to control every ingredient, ensuring freshness and comfort.
You will be surprised how simple ingredients such as flour, yeast, sugar, and butter can combine to create such a crowd-pleaser. This recipe is perfect for family gatherings, dinner parties, or as a special accompaniment to soups and salads.
For a deeper dive into the history and influence of Olive Garden’s menu, visit History of Olive Garden. Unveil the secret to recreating those soft, chewy, and aromatic Olive Garden Breadsticks – your guests will think they’re dining at the restaurant.
Ingredients for Olive Garden Breadsticks
- 1 cup warm water (about 110°F/43°C)
- 2 tablespoons granulated sugar
- 1 packet (2 1/4 teaspoons) active dry yeast
- 3 cups all-purpose flour, plus more for dusting
- 1 1/2 teaspoons salt
- 2 tablespoons unsalted butter, softened, plus 3 tablespoons melted for brushing
- 1/2 teaspoon garlic powder
- 1/2 teaspoon kosher salt
- 1/4 teaspoon dried oregano (optional)
Instructions for Making Olive Garden Breadsticks
- In a large mixing bowl or the bowl of a stand mixer, combine the warm water with the granulated sugar and yeast. Stir to dissolve, then let stand for 5-10 minutes until the mixture becomes foamy and bubbly.
- Add 2 tablespoons of softened butter, salt, and 2 cups of flour to the yeast mixture. Mix until just combined.
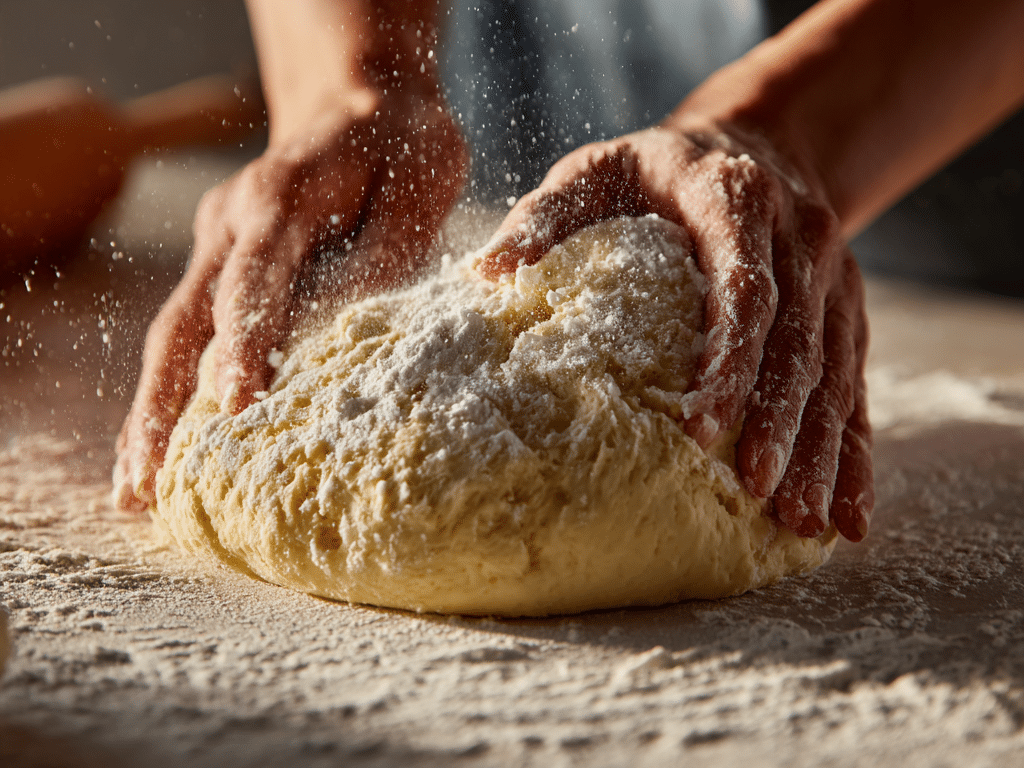
- Gradually add the remaining cup of flour, mixing until a soft and slightly sticky dough forms. If using a stand mixer, use the dough hook attachment; otherwise, knead on a floured surface.
- Knead the dough for about 7-8 minutes until smooth and elastic. Add flour a tablespoon at a time if the dough is too sticky.
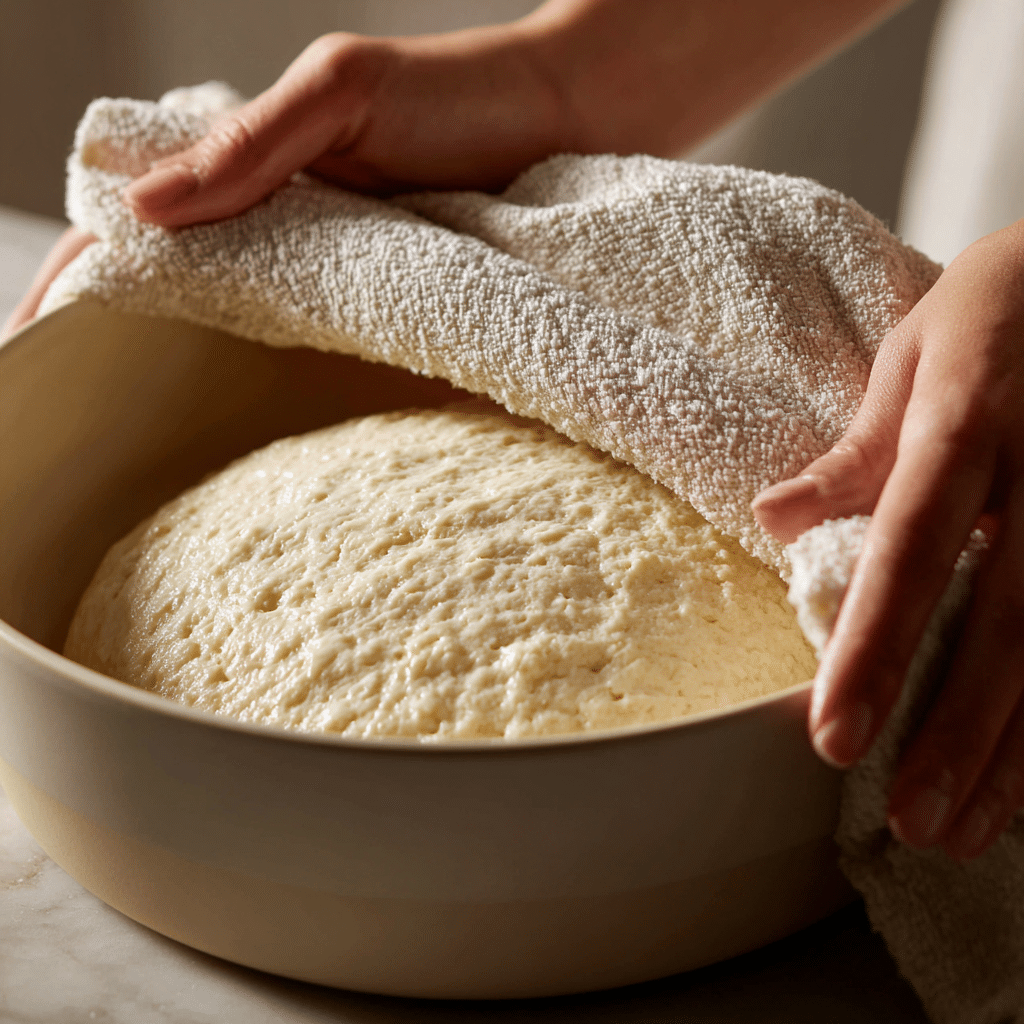
- Place the dough in a greased bowl, cover with a clean towel or plastic wrap, and let rise in a warm place for 1 hour or until doubled in size.
- Punch down the risen dough and divide it into 12 equal portions. Roll each piece into a 7-inch log and arrange them evenly spaced on a parchment-lined baking sheet.
- Cover the breadsticks with a towel and let them rise for 20-30 minutes, until slightly puffy.
- Meanwhile, preheat the oven to 400°F (200°C).
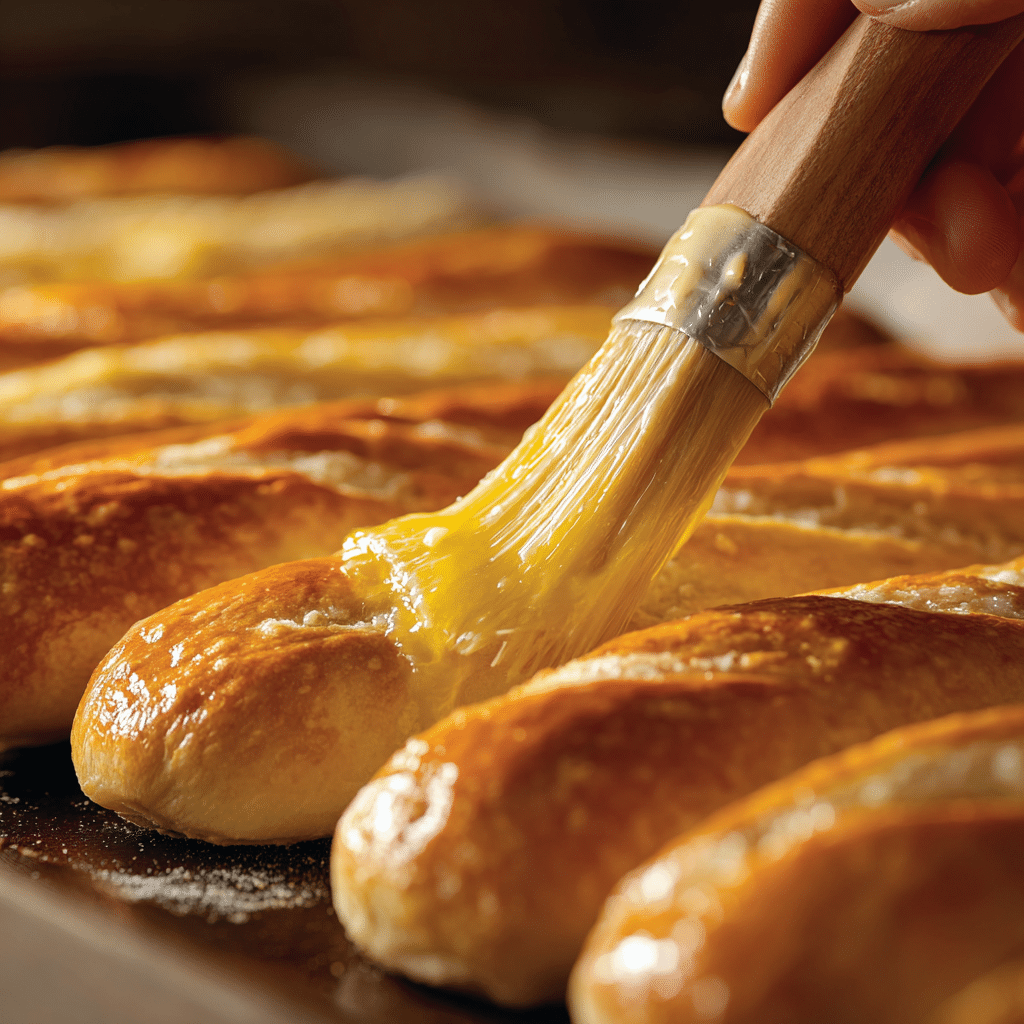
- Brush the breadsticks gently with half of the melted butter. Reserve the other half for post-baking.
- Bake for 11-13 minutes or until the breadsticks are golden brown on the tops.
- While the breadsticks are still hot, brush with the remaining melted butter and sprinkle with garlic powder, kosher salt, and dried oregano if desired.
- Serve immediately and enjoy your homemade Olive Garden Breadsticks!
Nutritional Information
One of the most attractive aspects of homemade Olive Garden Breadsticks is that you can manage their nutritional profile to fit your dietary needs. Typically, a single breadstick contains around 140 calories, 3 grams of fat, 24 grams of carbohydrates, and 4 grams of protein.
Most of the calories come from carbohydrates, primarily the flour and a small amount from the sugar and butter. The fat content predominantly comes from the butter used in both the dough and the topping.
For those keeping an eye on sodium, note that kosher salt and butter contribute to the overall sodium levels; reducing these can make the breadsticks heart-healthier. This recipe is cholesterol-free if you opt for plant-based butter, and it contains minimal dietary fiber unless you use whole wheat or blended flours.
If you’re concerned about daily nutritional values, you can check authoritative databases such as USDA FoodData Central to tailor the breadsticks to your nutritional requirements. Enjoying breadsticks occasionally fits into most balanced diets, especially as part of a meal with fiber-rich salads or lean proteins.
Wine/Beverage Pairings With Olive Garden Breadsticks
Olive Garden Breadsticks are wonderfully versatile when it comes to beverage pairings. For a classic Italian combination, serve these breadsticks with a crisp Pinot Grigio or a light Chianti, both of which complement the buttery richness and subtle garlic notes without overpowering them.
If you prefer non-alcoholic options, a sparkling lemonade or Italian soda will provide a refreshing contrast to the warm breadsticks. For those enjoying breadsticks alongside pasta or soup, a robust iced tea or flavored water can balance the meal.
The subtle flavors in the breadsticks make them a perfect canvas for both classic wines and creative mocktails, allowing your meal to shine.
Cooking Tips and Variations
Perfecting Olive Garden Breadsticks at home means paying attention to several important details. First, ensure your yeast is fresh and active as this will make your breadsticks rise beautifully, achieving the iconic fluffiness. Kneading the dough thoroughly (for at least 7-8 minutes) develops glutens, yielding the desirable chewy texture.
Be mindful not to add too much flour – the dough should be soft and slightly sticky. For added depth, infuse the melted butter with finely minced garlic or brush with olive oil for a Mediterranean twist.
You might also try sprinkling fresh herbs like parsley or basil for extra flavor. For a whole-grain version, substitute up to half the flour with white wheat flour. If you’re short on time, the dough may be prepared ahead and refrigerated after the first rise.
Let it come to room temperature before shaping. Those following vegan diets can substitute plant-based butter, ensuring everyone can enjoy homemade Olive Garden Breadsticks. For an extra-crispy crust, you can bake a few minutes longer, but watch closely so they don’t over-brown.
This recipe is very versatile and can even be shaped into knots or twists for a different look and texture.
Serving Suggestions
Olive Garden Breadsticks are best served warm and fresh from the oven, maximizing their soft interior and golden crust. Consider offering them as a starter in a breadbasket lined with a clean napkin to retain warmth.
Accompanying the breadsticks with a small bowl of marinara sauce makes for a delightful dipping experience. For a crowd-pleasing Italian dinner, serve alongside your favorite soups like Zuppa Toscana, minestrone, or creamy chicken gnocchi soup.
Breadsticks are also an excellent match for heartier main dishes such as lasagna, fettuccine alfredo, or chicken parmesan. For a lighter meal, they complement fresh salads, creating an Olive Garden-like experience at home.
When hosting gatherings, you can keep breadsticks warm in a low oven (around 200°F/95°C) covered in foil, allowing guests to enjoy them throughout the meal. Nothing makes a meal feel more special than passing around a basket of homemade breadsticks, especially when paired with themed Italian sides and entrees.
For an indulgent option, brush with extra garlic butter and sprinkle with grated Parmesan just before serving.
Olive Garden Breadsticks Health Benefits
Olive Garden Breadsticks, when made at home, offer several health advantages over restaurant versions. By choosing high-quality ingredients and controlling the amount of salt, butter, and sugar, you create a treat that fits better into a healthy diet. Breadsticks provide carbohydrates for energy and a small amount of protein.
For those pursuing healthier options, substituting half of the white flour with whole wheat flour increases dietary fiber, aiding digestion and providing longer-lasting satiety. Using olive oil instead of butter, or reducing total fat, further lightens the recipe while maintaining flavor.
Breadsticks are generally low in cholesterol and can be made completely dairy-free for vegan diets. Served with nutrient-rich vegetable soups or salads, these homemade Olive Garden Breadsticks become a balanced addition to meals. Keep in mind moderation, as bread-based sides can contribute significant calories if eaten in large amounts.
For more guidance on healthy baking, check resources like Harvard T.H. Chan School of Public Health’s Nutrition Source for evidence-based tips.
FAQs About Olive Garden Breadsticks
How do I store leftover Olive Garden Breadsticks?
To store leftover breadsticks, let them cool completely and place them in an airtight container or zip-top bag at room temperature for up to 2 days. For longer storage, wrap in foil and freeze for up to 1 month. Reheat in the oven at 350°F (175°C) until warmed through.
Can I make Olive Garden Breadsticks without a stand mixer?
Absolutely! You can mix and knead the dough by hand on a floured surface. It just takes a bit more effort to achieve a smooth, elastic dough but will yield equally delicious results.
Are there gluten-free adaptations for Olive Garden Breadsticks?
Yes, you can substitute all-purpose flour with a quality gluten-free flour blend. Be sure to add 1/2 teaspoon of xanthan gum if your blend does not already include it for better texture.
How do I make vegan Olive Garden Breadsticks?
Swap the butter for a plant-based alternative and ensure the sugar you use is vegan. The rest of the ingredients are inherently vegan-friendly, making this recipe adaptable for most diets.
What dipping sauces pair best with Olive Garden Breadsticks?
Classic marinara, creamy alfredo, ranch, or pesto are all fantastic dips for breadsticks. Choose according to your menu or personal preference.
Recreating Olive Garden Breadsticks at home is a wonderfully rewarding endeavor, bringing the warmth and comfort of a beloved restaurant classic to your table. With this detailed recipe, you gain full control over ingredients, flavor, and presentation, ensuring each breadstick meets your family’s needs. Whether you’re hosting an Italian-themed dinner, planning a cozy family meal, or simply craving a soft, garlicky breadstick, this recipe provides step-by-step guidance for foolproof results. Don’t be afraid to experiment with flavors, shapes, or serving ideas—homemade Olive Garden Breadsticks are endlessly versatile, always delicious, and sure to impress. Bake a batch today and bring a little bit of Olive Garden magic home.
Ingredients
- 1 cup warm water (110°F/45°C)
- 2 tablespoons granulated sugar
- 1 packet active dry yeast (2 1/4 teaspoons)
- 3 cups all-purpose flour
- 1 1/2 teaspoons salt
- 3 tablespoons unsalted butter (melted)
- 1/2 teaspoon garlic powder
- 1 tablespoon fresh parsley (chopped, optional)
Instructions
-
1In a large bowl, combine warm water, sugar, and yeast. Stir and let sit for 5 minutes, until foamy.
-
2Add flour, salt, and 2 tablespoons of melted butter to the yeast mixture. Mix until a soft dough forms.
-
3Knead the dough on a lightly floured surface for about 7 minutes, until smooth and elastic. Place dough in a greased bowl, cover, and let rise for 1 hour or until doubled in size.
-
4Preheat oven to 400°F (200°C). Divide dough into 12 equal pieces and roll into breadstick shapes. Place on a parchment-lined baking sheet.
-
5Brush breadsticks with remaining 1 tablespoon melted butter. Bake for 12–14 minutes, or until golden brown.
-
6Mix garlic powder with a pinch of salt and sprinkle over hot breadsticks. Garnish with fresh parsley if desired. Serve warm.
Approximate Information for One Serving
Nutrition Disclaimers
Number of total servings shown is approximate. Actual number of servings will depend on your preferred portion sizes.
Nutritional values shown are general guidelines and reflect information for 1 serving using the ingredients listed, not including any optional ingredients. Actual macros may vary slightly depending on specific brands and types of ingredients used.
To determine the weight of one serving, prepare the recipe as instructed. Weigh the finished recipe, then divide the weight of the finished recipe (not including the weight of the container the food is in) by the desired number of servings. Result will be the weight of one serving.
Did you make this recipe?
Please consider Pinning it!!